
Ice Cream Sandwiches – this recipe was inspired by very fond memories of my nan, who rest her soul is no longer with us. When I was young, we used to visit her and she would give us ice cream sandwiches as a treat. Deliciously creamy blocks of ice cream individually wrapped, then she’d give us to rectangle wafer biscuits to sandwich our ice cream between. As kids we would slowly lick around the edges of the ice cream, then squash the wafers down so the ice cream spread out to the edges of the sandwich again. Then we’d lick around the edges again and keep doing this over and over until finally we’d bite into the sandwich – wafer and ice cream. It was like heaven! As kids, of course we made it a competition to see who could make the ice cream sandwich last the longest. The BEST!
This Christmas as a treat, I recreated this childhood memory for my kids but homemade ice cream and biscuits instead. I made a really simple ice cream with 2 key ingredients, then a crispy gingerbread biscuit. There was so much excitement when I served this up as a surprise. I know this isn’t my usual low sugar type recipe but I have no problem with us having this sort of dessert because it’s out of the ordinary, not something we have often at all. Remember it’s just as important to allow this kind of food occasionally as it is to eat mainly real food.
Ice Cream Ingredients
- 600g thickened cream
- 3/4 can of condensed milk
- Handful of fruit of your choice – I used cherries (halved and took pip out)
- Handful of raw macadamias, roughly chopped
Ice Cream Method
- Whip the cream until it’s just starting to thicken
- Slowly add the condensed milk and continue to whip until it’s firm but not totally whipped
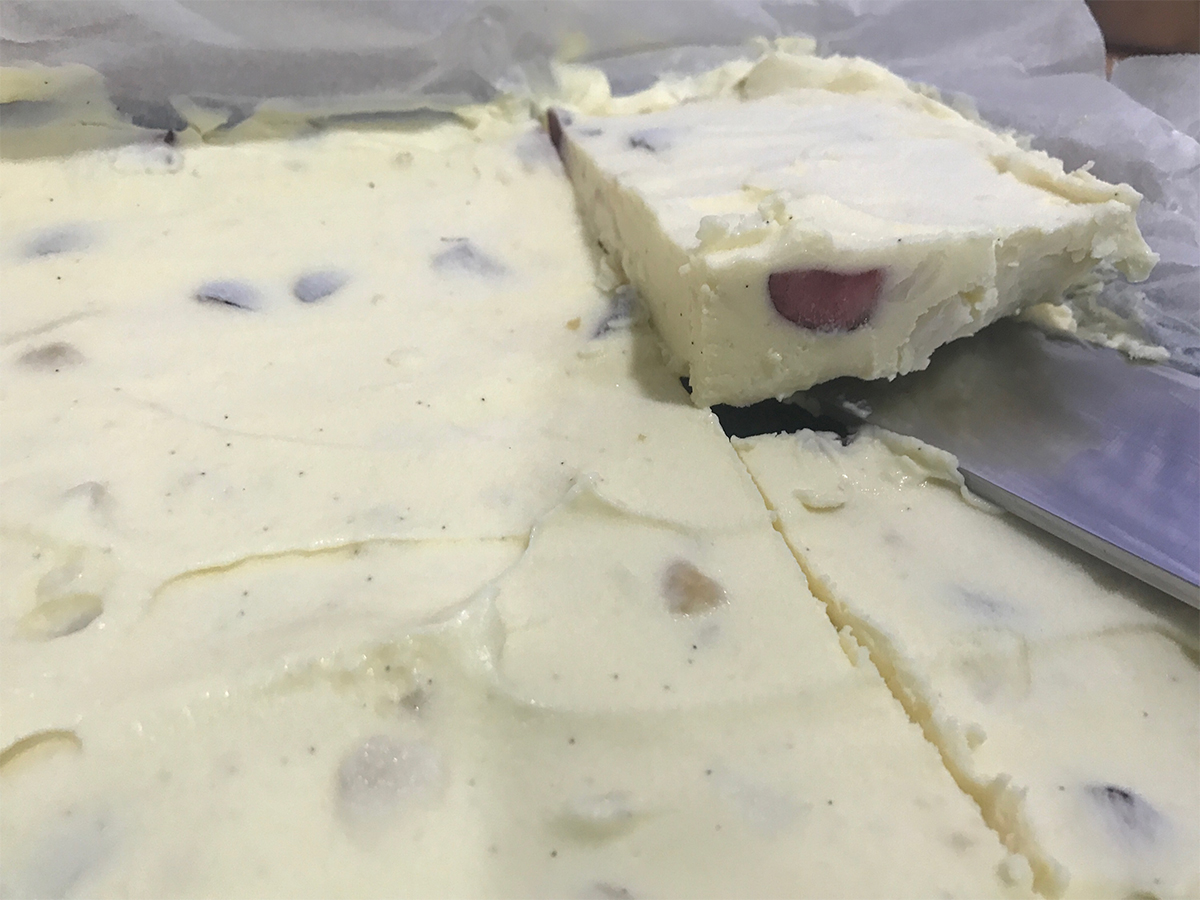
- Try not to put your whole face into the bowl before pouring it into a lined lamington tin
- Sprinkle the fruit and nuts over the top of the ice cream, then use a spatula to push them down into the ice cream (don’t mix unless you want the colour of the fruit to mix with the ice cream)
- Freeze overnight
- Cut into wedges roughly the same diametre as the biscuits you make. (Of course, you can just eat the ice cream as it is or with another dessert. You don’t have to put it on the biscuits).
Biscuits Ingredients
This is a great lunchbox biscuit but I just made them a bit bigger and changed the shape of them so they were rectangle. The recipe is from David Gillespie’s Eat Real Food book (a great read). I have modified it to use less rice malt syrup because we found the first batch we made were too sweet for our family’s taste.
- 100g butter
- 1/4 cup rice malt syrup (David’s recipe used 1/2 cup)
- 1 cup plain flour
- 1/4 tspn bicarb soda
- 1/4 tspn ground ginger
Biscuit Method
- Pre-heat the oven to 180 degrees, line a biscuit tray
- Melt butter over low heat and add rice malt syrup. Stir until combined
- Remove the butter syrup mixture and allow to cool so it’s just luke warm – give it another stir to make sure the syrup is totally mixed with the butter
- Add flour, bicarb and ginger. Stir until combined and smooth. It will be like a thick caramel sauce – not biscuit dough like at all
- Place a dessertspoon worth of the mixture on the tray. Allow enough space for the biscuits to spread and then put down another spoon worth. Keep doing this until the tray is full*
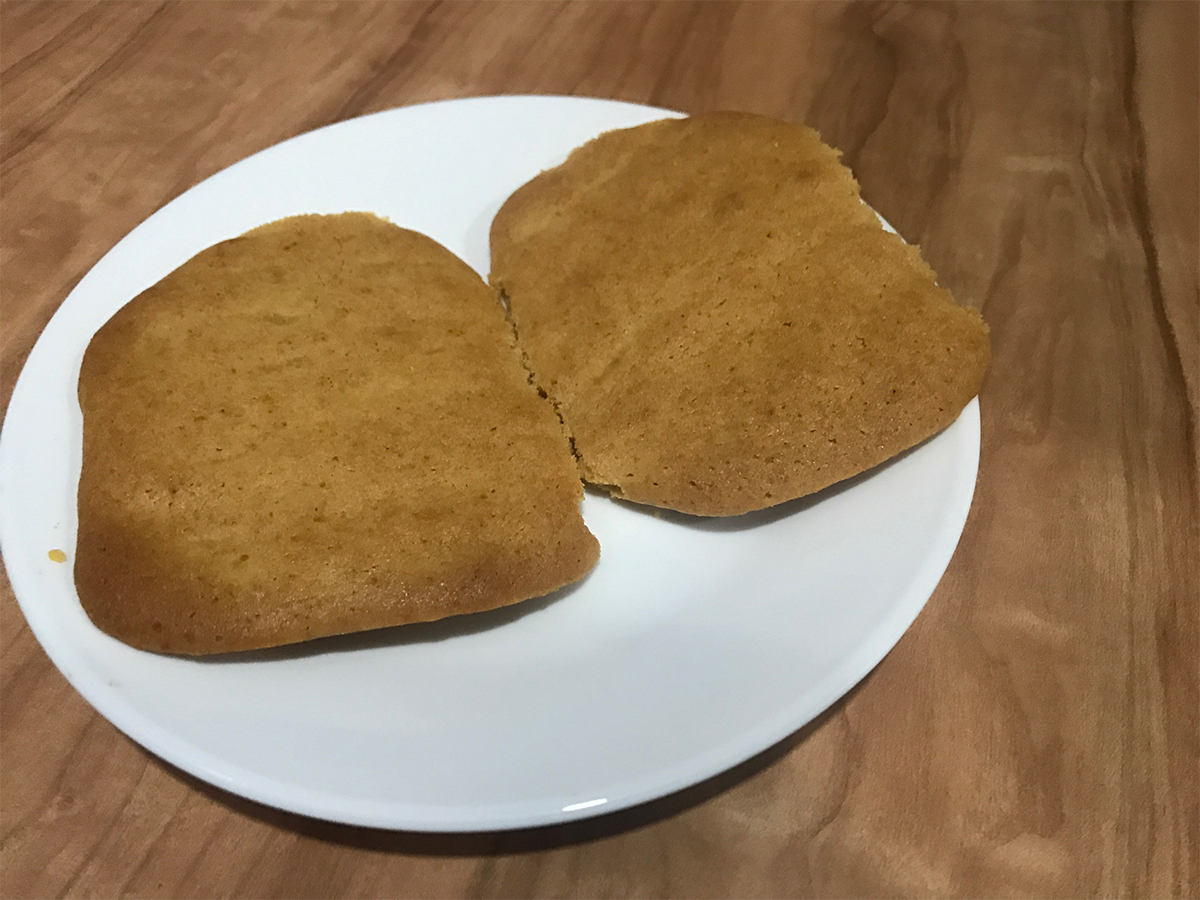
- Wet your fingers, and flatten out the biscuits, shaping them into a rectangle as you go. You want the biscuits to be thin so they are crispy when they are cooked*
- Bake for about 10-15 minutes until they are a golden colour, then remove and allow to cool on the tray. They will harden up when cool. Remove onto a wire rack to allow them to totally cool. You may need to break them apart if they have merged together
- Store in an air tight container in the freezer
* if you’re making these biscuits for school lunchboxes, use a smaller amount of the mixture and shape the biscuits with your wet fingers into smaller shapes (circles, rectangles, squares).
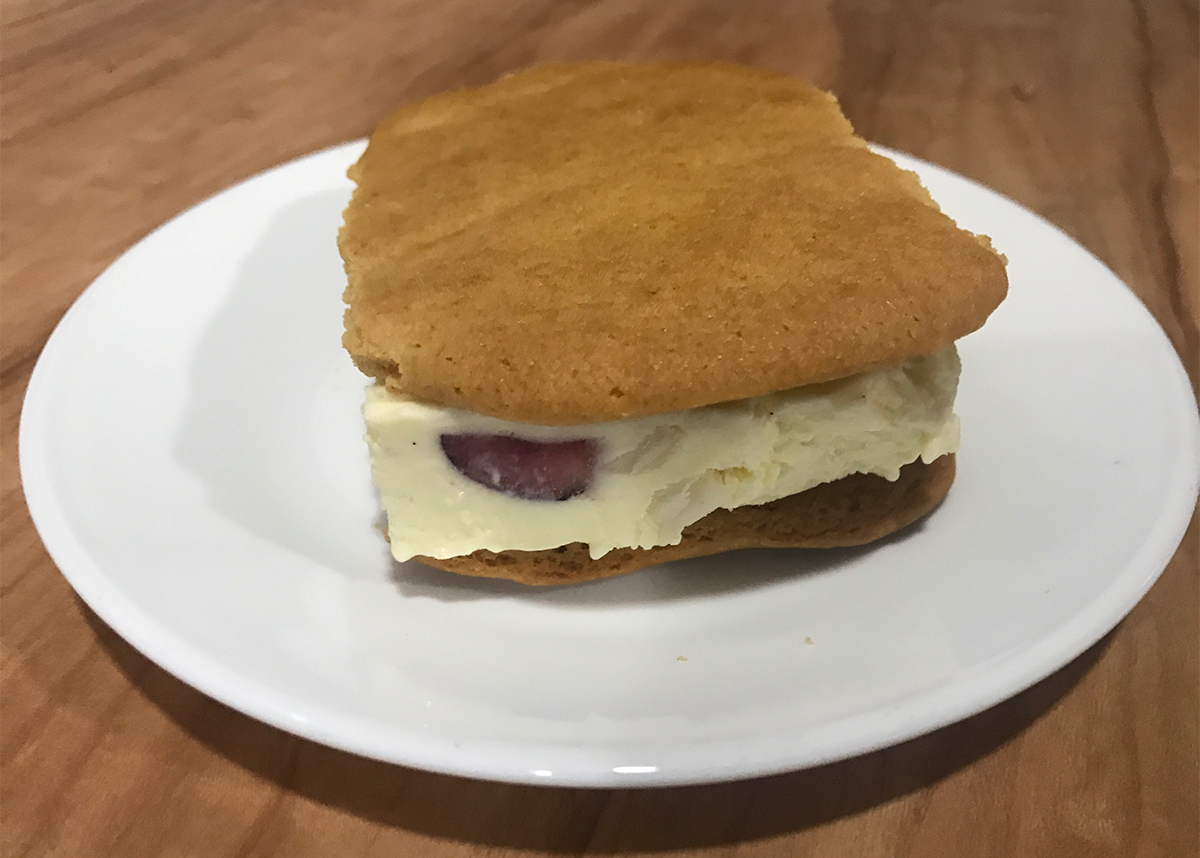
Ice Cream Sandwich Assembly
- Place a wedge of the ice cream on top of a biscuit, then top with another. Ice Cream Sandwiches – yummo!